

Avoiding Siding Damage During House Wash
Table of Contents
Why Siding Damage Happens During House Washing
Pre-Wash Inspection and Preparation Checklist
How to Pressure Wash Siding Safely
Pressure Washer PSI for Siding
Spray Nozzle and Spray Pattern Selection
Spray Distance and Spray Angle
Material-Specific Techniques: Vinyl, Wood, and Fiber Cement
Best Cleaner for Vinyl Siding
How to Clean Wood Siding Without Damage
Fiber Cement and Engineered Siding
Protecting Landscaping, Fixtures, and Surroundings
Electrical Fixtures, Outlets, and Vents
Landscaping Protection
Outdoor Items and Hardscapes
A Simple Protection Sequence
Preventing Water Intrusion Behind Siding Panels
How Water Gets Behind Siding
The Physics of Spray Angle
Sealing and Detailing Before You Wash
Diagnosing Intrusion After the Wash
The Drying Window
Troubleshooting and Repair After Accidental Damage
Frequently Asked Questions
Last Updated: October 15, 2026
Why Siding Damage Happens During House Washing
Siding damage during house washing usually comes down to one mistake: too much pressure applied the wrong way.
Vinyl, wood, fiber cement, and engineered products all handle water differently. Push the wrong nozzle at the wrong angle and you'll see damage within hours.
The key to prevention is matching your cleaning method to your siding material and keeping water moving away from seams and joints.
Pre-Wash Inspection and Preparation Checklist
Before you touch a pressure washer, spend 15 minutes inspecting your siding. Small cracks, loose panels, and open seams need repair first.
Complete this checklist before washing:
Walk the entire perimeter and look for cracks, holes, or splits in panels
Check all seams and joints where panels overlap, look for gaps or separation
Test vinyl siding by pressing gently, it should flex slightly, not crack
Repair damaged siding before washing. Seal loose panels and open seams first, or pressure washing will drive water into gaps and worsen the problem.
Avoid washing when rain is forecast within 24 hours; siding needs time to dry completely.
How to Pressure Wash Siding Safely
The safest approach to avoiding siding damage during house wash starts with the right pressure and technique.

Start low and work up. You can always increase pressure, but you can't undo a cracked panel.
Pressure Washer PSI for Siding
Too much PSI will crack vinyl, dent fiber cement, and strip paint off wood.
Safe PSI ranges by material:
Vinyl siding: 1,200-1,500 PSI maximum
Wood siding: 800-1,200 PSI maximum
Fiber cement: 1,500-2,000 PSI maximum
Most homeowner pressure washers deliver 2,000-2,500 PSI, too much for vinyl and wood. If yours has one setting, use a low-pressure nozzle or dilute the stream with a garden hose.
If you can't control the PSI, soft wash with a garden hose and brush instead.
Spray Nozzle and Spray Pattern Selection
The nozzle controls everything. Different colored tips deliver different pressure and spray patterns.
Nozzle guide for siding:
Red tip (0°): Concentrated, high-pressure stream, never use on siding
Yellow tip (15°): Still too powerful for most siding, use only on concrete
Green tip (25°): Safe for most siding when kept at proper distance
Start with a white or green tip. The wider pattern spreads pressure over a larger area, reducing damage risk; a concentrated high-pressure stream will always damage siding.
Spray Distance and Spray Angle
Wand distance matters as much as nozzle choice. Distance reduces effective pressure exponentially.
Safe spray distance guidelines:
Vinyl siding: 24-36 inches minimum
Wood siding: 30-48 inches minimum
Fiber cement: 18-24 inches minimum
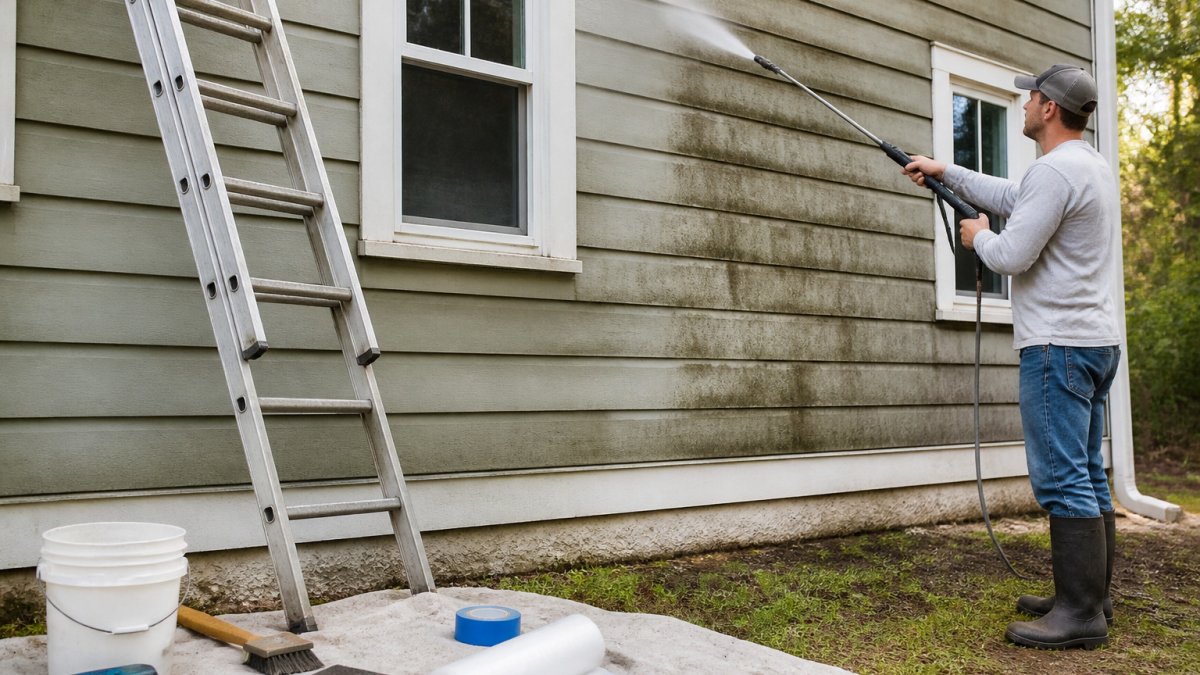
Spray downward, never upward, which forces water behind panels and into gaps. Work top to bottom so water flows naturally down the wall.
Keep the wand moving. Never hold spray in one spot for more than a second, or it will etch or crack the surface.
Material-Specific Techniques: Vinyl, Wood, and Fiber Cement
Each siding material needs a different approach. What works for vinyl will damage wood.
Soft Wash Evolution
Best Cleaner for Vinyl Siding
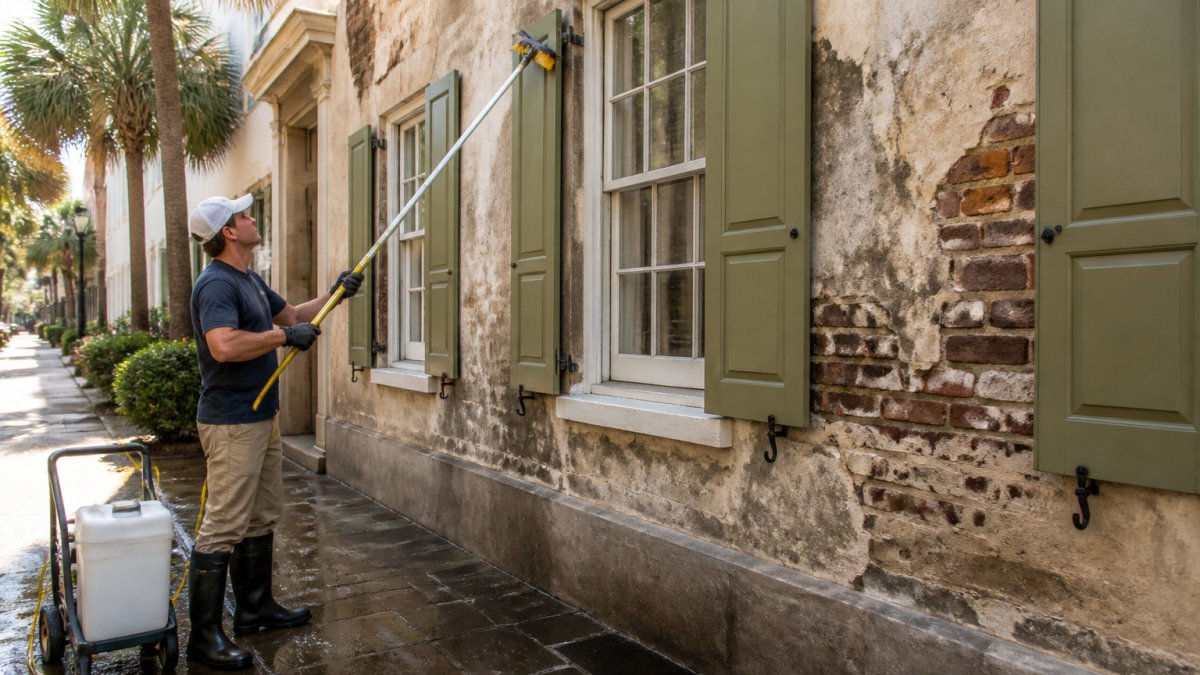
Vinyl is durable but sensitive to high pressure. The right cleaner does most of the work, so you don't rely on force. Use a mild detergent at a 1:10 ratio with water, apply with a soft-bristle brush or low-pressure spray, let it sit 10-15 minutes, then rinse gently. Avoid bleach or harsh chemicals on vinyl, which fade and discolor darker colors; oxygen-based cleaners are safer and still effective on mold and algae.
How to Clean Wood Siding Without Damage
Wood siding is the most vulnerable to pressure damage.
A soft-bristle brush and mild detergent are best. Scrub gently, then rinse with a garden hose.
Never spray upward on wood siding, water will seep into grain and cause swelling, warping, or rot.
Check for caulk gaps before washing. Wood expands and shrinks seasonally, creating cracks; seal them before water penetrates.
Fiber Cement and Engineered Siding
Fiber cement is tougher than vinyl or wood but still needs care.
Fiber cement handles 1,500-2,000 PSI safely at 18-24 inches minimum.
Engineered siding (composite or laminate) sits between vinyl and fiber cement in durability. Treat it like vinyl: moderate pressure, detergent, and brushing.
Always check the manufacturer's recommendations; some engineered sidings have coatings damaged by pressure or certain cleaners.
Protecting Landscaping, Fixtures, and Surroundings
Overspray, splashback, and runoff reach plants, electrical components, and outdoor equipment, often with invisible damage. A hazard-by-hazard plan keeps the wash contained.
Electrical Fixtures, Outlets, and Vents
Never improvise with electrical fixtures.
Outlets and switches: Cover exterior receptacles with plastic sheeting secured by painter's tape, or use outlet covers rated for wet locations. Do not spray directly at any receptacle, even a covered one.
Light fixtures: Wrap wall-mounted lights and their junction boxes. Water forced past a gasket can corrode the fixture or trip a GFCI circuit.
HVAC and dryer vents: Cover with plywood or heavy plastic. Spray driven into a vent can soak insulation, introduce moisture into ductwork, and, on a dryer vent, push lint and debris deeper into the run.
Watch Out Never spray near an electrical panel, meter base, or service entrance. If water reaches energized components, the shock hazard is immediate. Shut off exterior circuits at the breaker if you are unsure.
Landscaping Protection
Plants tolerate rain, not a concentrated stream of water and detergent at close range.
Trim back shrubs and groundcover at least 12 inches from the siding before you start. This gives you a clean spray lane and keeps foliage out of the splash zone.
Pre-wet plants with a garden hose before washing and rinse them again immediately after. Pre-wetting dilutes any detergent that drifts onto leaves; a post-rinse washes residue off before it dries and burns.
Shield delicate plantings with a tarp or plastic sheet staked between the wall and the bed. Remove the cover as soon as you finish so plants are not smothered.
Outdoor Items and Hardscapes
Move, do not just cover, patio furniture, grills, planters, and decorations. Spray can tip lightweight items and drive water into cushions and electronics.
Cover vehicles or move them out of the splash zone. Overspray leaves water spots on paint and glass.
Protect wood decks and railings below the wash area. Runoff carries detergent, and a deck finish can be dulled by repeated exposure.
Pro Tip Walk the perimeter with a hose on low pressure before you mix detergent. You will find the fixtures, plants, and low spots that need protection without risking a single panel.
A Simple Protection Sequence
Move vehicles and portable items out of the splash zone.
Cover electrical fixtures, vents, and the AC condenser.
Pre-wet and tarp landscaping.
Confirm drainage carries runoff away from the foundation.
Wash, then immediately uncover fixtures and rinse plants.
This order protects expensive and dangerous items first, then cosmetic ones, so you never stop mid-wash for something you forgot.
Preventing Water Intrusion Behind Siding Panels
Water intrusion is the silent failure mode of house washing. It happens behind panels where you can't see it, and by the time you notice a stain or soft spot, damage has been developing for weeks. Understanding how water gets in separates a safe wash from an expensive repair.
How Water Gets Behind Siding
Siding is a rain screen, not a waterproof barrier. It sheds bulk water while a weather-resistive barrier behind it handles what gets through. That system works when water runs down and out, and fails when water is driven in faster than it drains.
Water enters through four main paths:
Horizontal seams and panel overlaps. Water pushed sideways or upward at a seam overcomes the lap and travels behind the panel.
Penetrations. Window and door flanges, hose bibs, light fixtures, and vent hoods are all cut through the siding. Failed caulk or a missing flashing detail at any of these is a direct path inward.
Transition points. Where siding meets the foundation, soffit, trim, or a roof-to-wall junction, the detailing is complex and the first place to leak.
The mechanism tells you what to avoid: any spray angle or pressure that overcomes the drainage path.
The Physics of Spray Angle
A downward spray at a shallow angle lets gravity work: water hits the panel, runs down the face, and sheds off the bottom edge. Upward or perpendicular spray drives water against the lap and into the seam.
Keep the wand angled down at roughly 30 to 45 degrees from horizontal.
Never spray straight into a seam or hold the wand perpendicular to the wall.
Work top to bottom so clean water rinses dirty water down and off, rather than pushing it into lower seams.
Sealing and Detailing Before You Wash
Caulk and flashing are your first line of defense, if intact.
Inspect every penetration before washing: window and door perimeters, hose bibs, utility penetrations, and light fixture bases.
Re-caulk failed joints with an exterior-grade sealant rated for your siding material. Let it cure fully before washing, most sealants need 24 hours or more.
Check flashing at roof-to-wall junctions and above windows and doors. If you can see daylight or a gap, the detail has failed and washing will make it worse.
Watch Out If you find soft trim, bubbling paint, or a musty smell near a window or door, stop. Those are signs water is already getting in, and pressure washing will push more behind the panel.
Diagnosing Intrusion After the Wash
Water intrusion rarely announces itself. Check for these signs days and weeks after washing:
Water stains on interior ceilings or walls, especially below windows and at the top of walls.
Bubbling or peeling paint on siding or trim, which often means moisture is trapped behind the film.
Soft or spongy wood at trim, fascia, or the bottom of a wall.
If you see any of these, stop washing and let the wall dry. A moisture meter from most hardware stores can confirm whether a wall is wet behind the surface; persistent readings mean it needs professional inspection.
The Drying Window
Even a perfect wash leaves water in seams and behind panels. Trapped moisture feeds mold and rot, so siding needs time to dry.
Wash when you have at least 24 hours of dry weather ahead, ideally 48.
Avoid washing in the evening when temperatures drop and dew forms before the wall dries.
Do not wash if rain is forecast within 24 hours. Rain re-wets the wall and extends the drying time.
Key Takeaway Water intrusion is a drainage problem, not a pressure problem alone. Keep spray angled down, keep seams and penetrations sealed, and give the wall a full drying window. If you see signs of intrusion after washing, stop and let it dry before doing anything else.
Troubleshooting and Repair After Accidental Damage
If you've already caused damage, address it sooner rather than later.
Common damage and fixes:
Cracked vinyl panels: Small cracks can be sealed with clear silicone caulk. Larger cracks require panel replacement. Don't wait, water will enter the crack and cause hidden damage.
Stripped paint on wood: Sand the area smooth and repaint with exterior-grade paint. Exposed wood will rot quickly if left unprotected.
Dented fiber cement: Minor dents are cosmetic and don't require repair. Deep dents that expose the substrate should be sealed with caulk to prevent water entry.
If water stains appear days or weeks after washing, water has likely gotten behind your siding. Stop using your pressure washer and call a professional.
Avoiding siding damage during house wash comes down to respecting your material and using the right technique. If your siding is older, delicate, or already showing wear, professional cleaning is worth the investment.
Frequently Asked Questions
How far should a pressure washer nozzle be from siding?
Keep the nozzle 12 to 24 inches away from the siding surface, depending on the PSI and spray pattern. Start at the greater distance and move closer only if needed. For vinyl siding, maintain at least 12 inches; for wood or fiber cement, stay closer to 18-24 inches. Always test on an inconspicuous area first to ensure the water pressure won't cause damage or strip paint.
Can pressure washing force water behind siding panels?
Yes. Excessive pressure or incorrect spray angles can drive water behind siding panels, causing rot, mold, and structural damage. Spray downward and away from seams and trim, never upward or horizontally into gaps. Use low-pressure soft-wash methods when cleaning near seams, and avoid directing water into any opening or joint where moisture could become trapped.
What PSI should I use to clean siding safely?
For vinyl siding, use 1200-1500 PSI with a wide spray pattern. Wood siding requires 500-1000 PSI to avoid gouging or stripping paint. Fiber cement can tolerate 1500-2000 PSI, but always start lower and test first. Soft-wash systems using low-pressure cleaning solutions (under 500 PSI) are safest for all materials and are particularly effective at removing algae, mold, and grime without surface damage.
Should I use a pressure washer or soft wash on siding?
Soft washing is the safest choice for most siding materials. It uses low pressure (under 500 PSI) combined with eco-friendly cleaning solutions to remove organic growth like moss, algae, and mold without damaging paint, seals, or the siding itself. Pressure washing works for concrete, driveways, and tough grime on hardy surfaces, but soft washing is gentler and delivers longer-lasting results on siding, trim, and delicate finishes.
GET A QUOTE

Comments